Recover your Pen Drive Lost Data

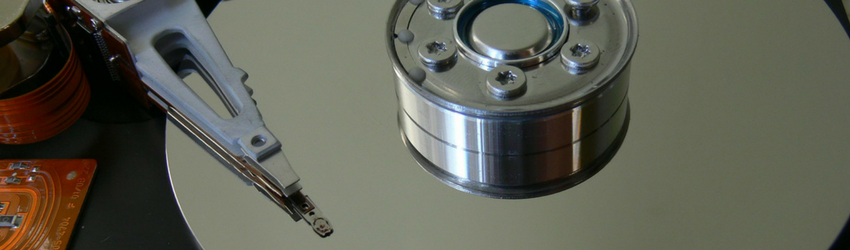
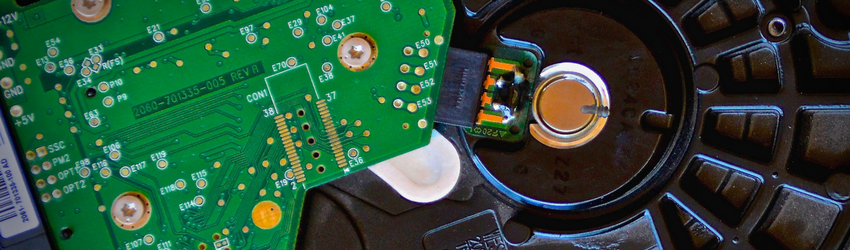
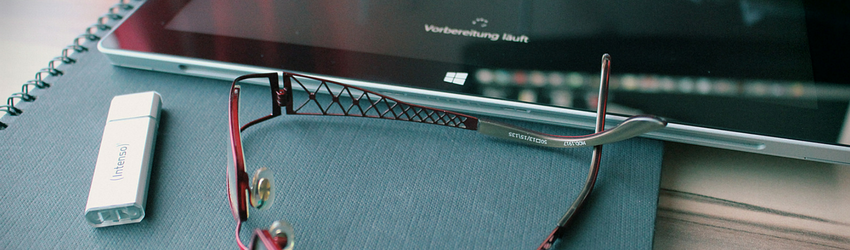
Pen drive or any storage drive is used for backup and store essential files like videos, photos, and documents. The storage device is portable that’s why people use it for convenience and further use. Most people use a USB for important data transfer and storage. But the issue creates when the drivers get corrupted. A virus or malicious attack can create such problem and may destroy your data. If you face the same issue, contact the Data Recovery team and get your problem fixed.

Recover your Pen Drive Lost Data

Here, follow the steps and fix your problem by pursuing the solution below-

If your USB becomes corrupted or unreadable, chances of having virus attacks are more. The disk is not accessible, the pen drive creating folder shortcuts, hiding some files then follow the steps and fix the problem.

Solution 1: recover pen drive using CMD

  • Foremost, connect the corrupted USB to your device.
  • Tap on the start button and right-click on it.
  • Select command prompt and enter USB name.
  • Then click on attrib –h –r –s /s /d *.*, and hit enter.
  • Check the USB and your file will be restored.

Solution 2: Recover Deleted file using pen drive recovery software

  • Connect your USB to your computer.
  • Launch RePicvid USB recovery software and tap on All File Types.
  • Now, scan your USB for Deleted and preview when RePicvid detects the pen drive. It will show in removable disk with brand name e.g Sandisk.
  • After this, choose the files you want to recover and click to save it.

Here the process ends. If you have any further queries you can get in touch with us and recover your missing data. We will guide you throughout the process so you can retrieve your files without any loss. To connect with the team you can reach us through online and offline mode. Here we assure you’re the genuine and Cheap Data Recovery Perth. You can recover your data from any hard drive such as pen drive and hard disk.

Also, Read: Easy Steps To Backup A Backend Database On Your Pc

How to retrieve data from the RAID-based NAS?

NAS (Network Attached Storage) is one of the most excellent storage devices. You can compare this device to the File Server that links to network. Using this network an authorized user can store the data and recover in case of data loss. RAID-based NAS is quite amazing because it is cost-effective, trustworthy and expandable storage solutions among small businesses, enterprises, & individuals. It lets the users include or remove storage drivers from it depending on the requirement. It can fail due to many reasons like power failure, overheating, virus attack, wrong setup, OS issues, hardware controller failure, system failure, etc. Here the experts of Data Recovery Perth teach you to perform NAS RAD recovery method with the step-by-step guidance.

retrieve data from the RAID-based NAS

  • Firstly, you need to turn off the RAID NAS. Take out all hard drives from it and note down the series in which they are lined up in the rack.
  • Through USB or SATA, connect all NAS RAID drives to Windows PC. Make sure to connect all drives at one time.
  • Now you have to install the “Stellar Data Recovery Technicians Software” on your system and run the installed program on your system.
  • Decide what to retrieve now- pictures, videos, audios, documents, emails or other files & folders.
  • Hit the Next button and from the Select Location screen, select ‘RAID Recovery’.
  • Click the Scan Select either RAID 0, 5 or 6 tabs under the ‘RAID Reconstruction’ window.
  • From the RAID list box, you need to shift RAID disks to Move Hard drives up/down for disk order with the help of left-right arrow buttons.
  • To line up disk in the right order, use the Up/Down arrow button nearby the list box.
  • Click the option titled as ‘Don’t know start sector of drives. Show the list of probable start sectors’ if you aren’t sure about disk order. From the given checklist box, select one or more probable start sectors. Alternatively, you can use Add sector button to manually input & add probable sectors if not given in the checklist box.
  • From the appeared drop-down, select Stripe/Block Size’ and click the ‘Build RAID’.

If the parameters that are given are accurate then a feasible RAID construction and created Volumes will appear in the “Select Construction RAID Window”.

  • Click the option titled as ‘Show Volume List’ and move ahead with next steps.
  • In ‘Select Volume to Recover Data’ windows, choose the volumes from need to recover and once done, hit the Scan button.
  • If you don’t find the desired documents in the result, select the click here’ link.
  • In ‘Tree View’ option given on the left side, all recovered folders & files are provided. Click the checkboxes of the files/folders that needs to be recovered according to you. Hit the Recover button and a pop up will appear.
  • Choose a specified location for data saving by clicking Browse.
  • Hit the ‘Start Saving’ button to save the chosen items at the preferred location.

Once all the data is recovered, start reconfiguring RAID NAS storage by formatting the drives. According to Data Recovery Service Perth you are advised to copy the recovered data to RAID NAS & use NAS storage like before.

Also Read: How to get back the raw data from a USB drive?

How To Fix Windows Detected Error In Hard Drive?

Having trouble accessing your data on Hard Drive or getting errors? Stop worrying as we are going to help you fix it all without making you reach any service center. Well, let face it, this issue arrives in everyone’s life at a time or another. We all save our important data on our hard drives. But what if you are on the stake to lose it all?  Believe us we can understand the fearful state you must be into at the moment. That’s why we are here to calm you down by giving you a solution to your problem. If you are also getting “Windows detected a hard disk problem” problem on your Windows PC, then you need to read this whole blog to fix it up. But before actually heading onto any decision, we want you to find the cause of the hard disk problem.

how-to-fix-windows-detected-error-in-hard-drive

  • Check if there’s Virus on your computer.
  • If your hard drive is corrupted or damaged.
  • Mechanical or system errors for example registry error on your device.
  • Hard disk failure or Bad sectors on a hard disk partition.
  • False error detection.

Now that you are clear about the cause of the issue, you are ready to resolve it. In case if you find nothing wrong with your computer’s Hard Drive, you can follow these steps to dismiss the error.

  • Enter gpedit.msc in the search box and then hit Enter.
  • Select Administrative Templates and then go to System.
  • Now click on Troubleshooting and Diagnostics option and then select Disk Diagnostics.
  • Select Disk Diagnostic: Configure execution level and then select Disabled.
  • Click on Apply and then OK to apply these settings.
  • Try restarting your computer and then check if the issue still persists.

Use the steps given below to fix Windows detected a hard disk problem error from your computer.

  • Enter cmd in the Windows search box and then Hit Enter on your keyboard.
  • Now enter sfc /scannow in the given space and click Enter again.

This will scan all your files from your system and replace the corrupted files with a backup copy. Once the scanning finishes, you can access your data easily. In case if the problem continues, you can also use this process to fix your hard drive.

  • Hit Win+R key on your keyboard to open Run.
  • Now Enter cmd and press enter.
  • Next, you need to enter chkdsk C:/f /r /x and then press enter.

This method will scan and fix all the issues with your Hard Drive. We hope the blog was helpful and you’ve been able to resolve your issue. If there’s some issue you are not able to fix on your own, consider contacting Cheap Data Recover Parth for help.

Also, Read This Blog: Facing Problem While Recovering Data From Damaged Hard Drive

Get recover your lost data from Android device

Well, if you have confronted the data loss issue in your Android phone, don’t get worried. Our Mobile data recovery team will ensure the ideal way where you can retrieve your data. It is quite simple to recover the lost data on an Android phone as compared to other phone software. It comes with pre-installed Google Play which allows you to install various apps on your device according to your needs. You can store as much data as your phone and external memory allow you to. It is always recommended to backup all your data available in your device so, if in case, anytime this situation occurs, you can recover your data effortlessly.

Our Android Mobile data team will ensure you the most appropriate way to fix the problem. The techies will also help you with other matters regarding data recovery. You can blindly trust our services as we are an experienced and authentic service provider. You can pursue the below steps to recover your lost data.

Steps to recover lost data from your Smartphone-

  • Run Android data recovery-
  • Download and install an Android data recovery option.
  • After this, connect your Smartphone to PC via a USB cable.
  • Setup Android to enable USB debugging-
  • On latest Android version go to the settings and tap on “About phone”.
  • Select “Build number” for multiple times until you get a note.
  • On old Android version go to the Applications, select Development and then tap on USB debugging.
  • Scan your data on your device-
  • When you have enabled the USB debugging, your device will detect it.
  • Place the cursor to the file you want to retrieve and then tap on the Next button.
  • On the next window, tap on Allow button and go to your computer and hit the Start button to continue.

Check and restore pictures, videos, messages, and contacts from Android phone-

  • Check and select those files you want to retrieve.
  • Hover the cursor to the “Recover button” and you will get all your lost files back.

Congratulation, your lost file is now recovered. Check the original place from where the data get lost. If you have any other query or doubt concerning your data lost, you can Online Perth Data Recovery Service Center Australia team for all the greatest support assistance.

Also, Read This Blog: How To Recover Deleted Items From A Mac Device?

To How, Recover Lost Files From iTunes And iCloud?

Accidentally formatted your iOS device? Go through this blog and find out how you can recover it easily. Whether you want to recover the deleted or lost files from your mobile storage, iTunes Backup or iCloud Backup, you don’t need any specific technical knowledge to recover it all. Use the below steps to run data recovery on your iPhone, iPod or your iPad devices.

  • First of all, you need to download EaseUS MobiSaver on your Windows computer and then run the downloaded installer file to install it.
  • To recover all the backups of your iPhone, iPad or iPad, launch EaseUS and then select Recover from iTunes.
  • Click on Backup Files and then select Scan. EaseUS MobiSaver will run a scan for all your backups from your iTunes.
  • The entire backup on your iTunes will show up on your screen. Select all the files which you want to recover and then click on Recover to initiate the recovery of your files.

Check your computer for the recovered files. In case you are not able to retrieve your lost files using the above steps then contact Online Data Recovery Service Center Australia for professional assistance. To recover deleted files from iCloud Backup, use the below steps:

  • Launch EaseUS software on your Windows device and then select Recovery from iCloud.
  • Provide your iCloud username and password and then click on Login.
  • Once you’ll log in successfully, you can access your entire iCloud backup. Click on backup files and then select Scan.
  • EaseUS will now scan your iCloud for the deleted or lost files and displays the result.
  • Now you will see your lost data files on your screen, select the one you want to recover including videos, contacts, messages, notes and then select Recover to save it all on your computer.

Need help regarding your iPhone Data Recovery? Contact Data Recovery Perth for the finest assistance possible right at your place.

Also, Read This Blog: How to retrieve removed Game Files on MacBook?

Use Recuva To Recover Deleted Files From Your Hard Drive

So you have accidentally deleted your important files and looking forward to recover it anyhow. We can understand how frustrated and worried you must be right now. Well, there’s no need to feel sad as you can recover it easily using Recuva Data recovery software.  Yes, you heard it right! Recuva can help you recover your lost data from your device without the need of professional help. Furthermore, the software is really easy to use and also free of charges. Not only that, using Recuva you can also recover, other storage media devices like memory sticks, digital cameras, SD cards, compact flash cards, pen drives, and many more. Given below are the steps to recover your data from Hard Drive using Recuva software:

  • First of all, download and install Recuva on your device.
  • As soon as you’ll install the software, a welcome window will show up.
  • Click on next and then choose the type of files you want to retrieve.
  • Note that you can only select one type of file for example pictures at a time. If you want to recover various files including Pictures, Music, Documents, etc, you will have to do it one by one.
  • After selecting the file type, click on Next.
  • Select from the given options the location where these files were saved. You’ll be given a couple of options including you don’t know about it, on removable drives, in the documents folder, in the recycle bin or you can also enter a specific location manually.
  • After that click on Browse and select an exact location from where the files were deleted.
  • Click Start and wait for the files to recover. Note that only select Deep Scan option after you fail the first attempt as it can take a lot of time.
  • Recuva will now start to recover your files, wait for it to finish.
  • Now you will see all your deleted files, select the check box next to the file you want to retrieve and then hit the recover button.
  • Now here you need to select a location where you want to save the recovered files. Select a different folder from where it was deleted to avoid any confusion and then select OK..
  • At last check, the folder for recovered files and then recover other deleted files if you want.

Not able to recover your data? Let our certified engineers do the wonders for you. Contact Perth Data Recovery Service and leave all your worries to us. We propose to recover even your data even it most complicated cases. Still, if due to some reason we wouldn’t be able to succeed, we won’t charge you for our service.

Also, Read This Blog: Get over with corrupted Hard Drive with the data assistance team

Perth Data Recovery Service With The Highest Level Of Technical Expert

data recovery in Perth

Have you experienced a crash or has your hard drive died in and you have forgotten to back your device up?

Perth Data Recovery guarantees the highest level of technical expertise and customer service for data recovery in Perth

Perth Data Recovery aim to maximise the chances of a successful data recovery from every make and model of storage device, while offering the ultimate customer service experience. Digital data can plays a vital role in both businesses and personal lives for people in Perth, and can have a devastating impact if lost.

From corporate financials to irreplaceable family photos, Perth Data Recovery guarantee you will receive the highest level of technical expertise and customer service from Perth Data Recovery, data retrieval group.

hard drive data recovery in Perth

Hard Drive – Data Recovery

Hard disk’s can break down however, they are not necessarily as catastrophic as originally thought. Perth Data Recovery’s, data retrieval experts have seen all kinds of electronic and mechanical damage from internal and external hard drives in Perth and have managed to recover data from them. Using our unique software, Perth Data Recovery’s engineers are able to fully recover files form almost every damaged hard drive.

After dropping off the media at our Perth office we can have your recovery files returned to you in as little as 24 hours thanks to our three steps to data retrieval for hard drives. 

The first step is to diagnosis the issue with the drive. Perth Data Recovery engineers inspect the damage and provide you with an estimation of the amount of data will be recoverable and a quote for the price of there service.

The next step is the examine and repair the external and internal electronics of the hard drive, such as the motor controller, broken data paths, pre-amplifier, motor and re-written servodata/service area.

The final step is to examine and repair the mechanical aspects of the drive, such as the scratched plates, broken headed sized bearings, damaged servodata/service areas and off-axis plates.

solid state drive data recovery in Perth

Solid State Drive (SSD) – Data Recovery

Perth Data Recovery have made breakthroughs in SSD recovery techniques allowing their engineers to resolve an issue often referred to as “Busy” that affects many of the makes of SSD’s.

The symptoms that indicate this issue is occurring to a solid state drive include:

  • The computer does not recognise the drive
  • Does not detect that the drive is connected
  • The file system has been corrupted
  • Operating system will not boot correctly
  • The drive is being detected as the wring size

Perth Data Recovery can recover data from any make of SSD that is suffering from this problem. The end user will often see when this problem occurs as the drive is no longer recognised by the system.

The cause of a drive entering into this “Busy” state is often to do with the drive not initialising correctly so it can never enter a “Ready” state. The engineers at Perth Data Recovery are able to alter the intialisating using specialised equipment and then access the drive’s FW to find and repair the problems which then allows the recovery of the data.

While undertaking the recovery process copies of the data are made in order to preserve the original files. In many cases, you will be able to use the disk again and even utilise the disk without reinstalling. Upon receiving all of the salvageable data from the drive we will then proved you with a a detailed file list. We also are able to transfer recovered files onto any device of your choice including uploading to cloud storage.

Do you have an issue with your computer? Our partners are Century IT Consultants can identify & Fix Computer Problems Fast.

For more information on Perth Data Recovery’s, Perth Data Recovery Service or on the range of internal and external hard drive data recovery services

Source